


With the spookiest season of the year just around the corner, it’s time to unleash your creativity and get ready to immerse yourself in the world of DIY Halloween crafts.
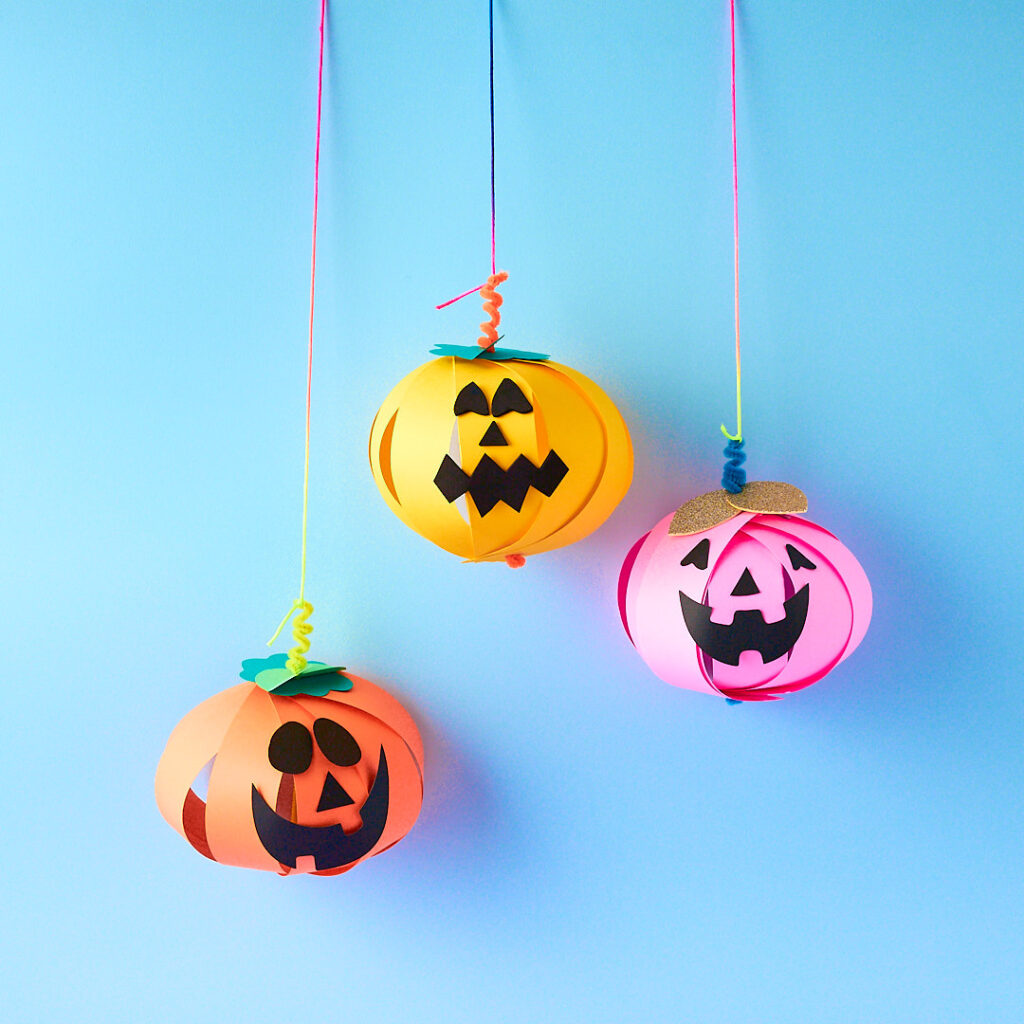
And what better way to kick-start the festivities than by making your very own spooky Halloween pumpkins out of coloured paper? In this blog post, we will show you how to create ghoulish paper pumpkin delights using simple materials like coloured paper, scissors, and glue. Whether you’re looking to decorate your home, organise a Halloween-themed party, or engage in a fun activity with your kids, making these paper pumpkins is the perfect way to add a touch of eerie charm to your celebrations.
So, gather your ghostly supplies as we embark on this hair-raising adventure, where we’ll unveil every step to craft these ghastly delights. From selecting the perfect materials and templates to cutting, folding, and assembling!
Plus, we’ll sprinkle in some handy tips and tricks to help you put your own spine-tingling twist on these paper pumpkins. Grab your broomsticks and prepare for a spellbinding journey through the world of Halloween crafting. We’ll show you how to summon your inner artist and transform ordinary coloured paper into extraordinary boo-tiful paper pumpkin masterpieces!
Let’s get started!
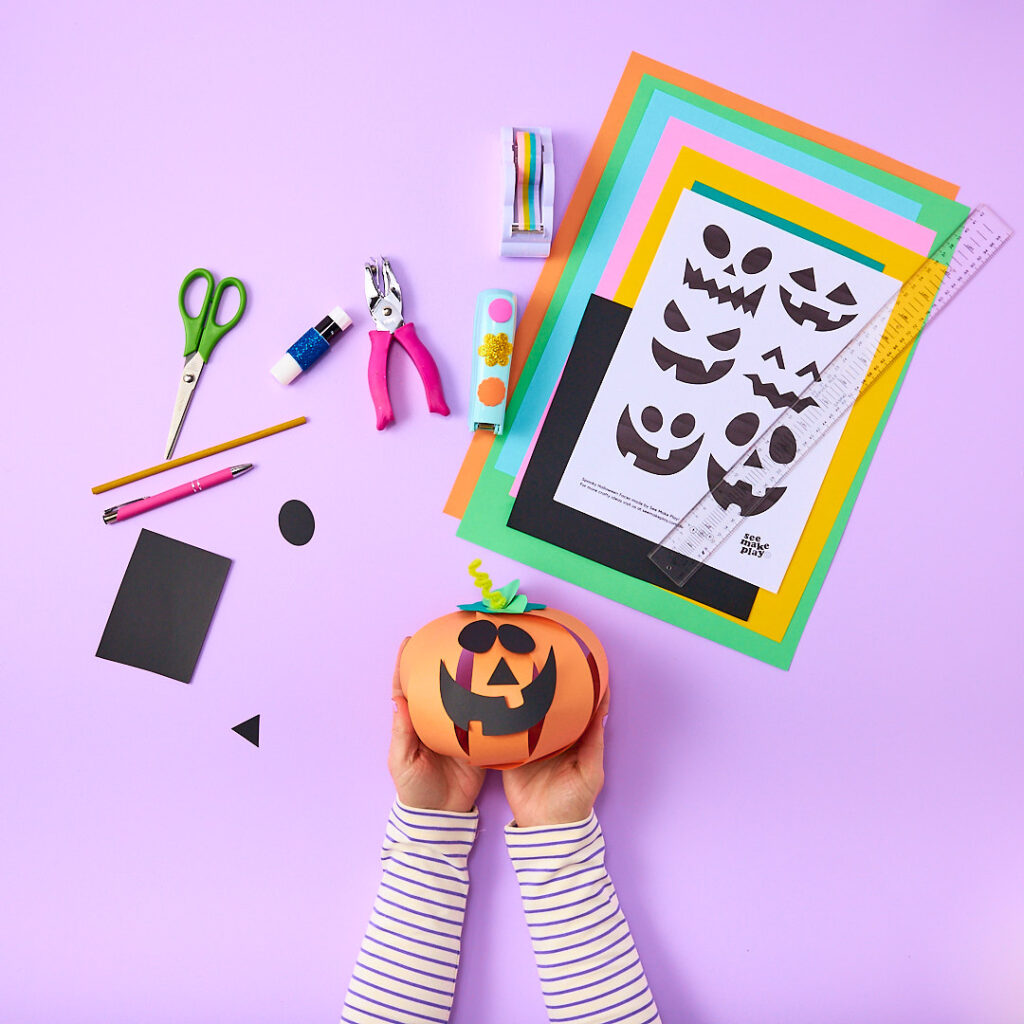
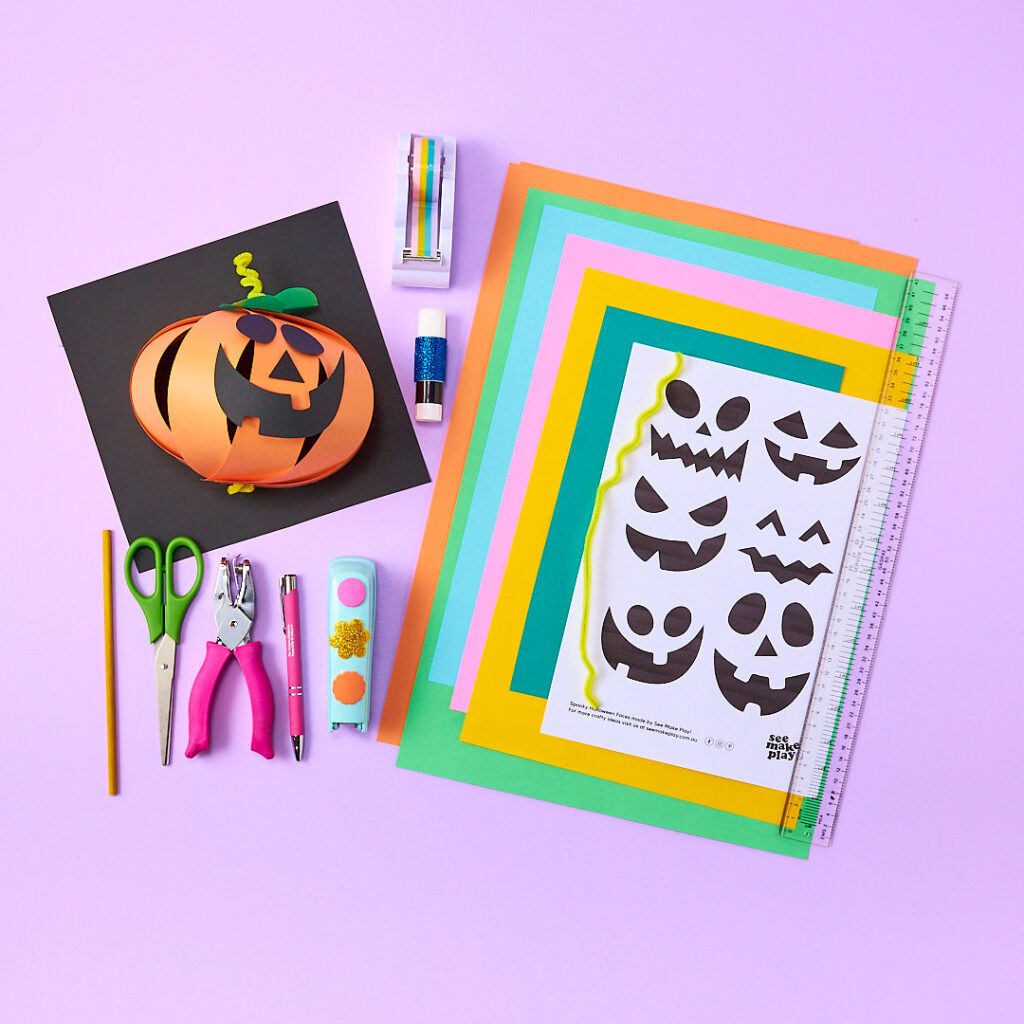
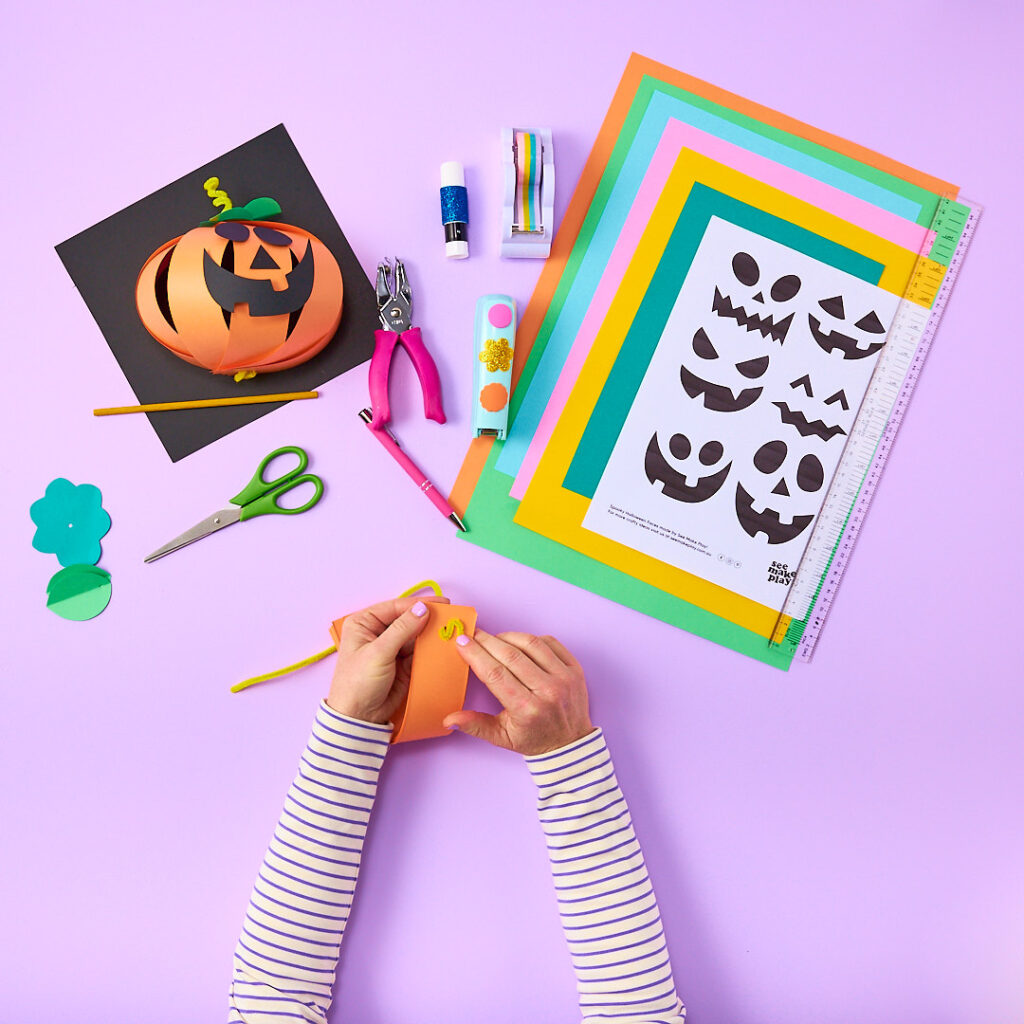
Materials:
🟣 Coloured thick card stock in A4 or A3
🟠. Pipe cleaner
🟣 Hole punch
🟠 Glue (hot glue gun or glue stick) or sticky tape
🟠 Scissors & stapler
🟣 String to hang up your pumpkin
Instructions:
Grab a sheet of coloured card stock, making sure it’s a standard size like A4 or A3. It is also important to make sure your card stock is thicker than copy paper as we want it to be nice and sturdy when we turn it into our spooky pumpkin shape.
Fold it in half horizontally, running your fingers along the fold line to create a sharp crease. Repeat this process by folding the paper in half again. Finally, fold it in half once more and create a crisp crease line.
Open up the folded sheet to see your 8 equal vertical crease lines. Now, take your scissors and cut along each line to create 8 strips. Once you have cut all of your strips out, put them to one side so you can prepare for the next step.
In this step we will be creating holes to thread our pipe cleaner through. To make hole punching easier, separate the 8 strips into 3 piles. This will ensure they’re not too thick. Grab your hole punch and center it about 1.5cm from each end of every strip. Punch a hole at the top and bottom of each strip. If it is easier, you can also use a pencil to measure and mark where each hole needs to go and punch each hole one at a time.
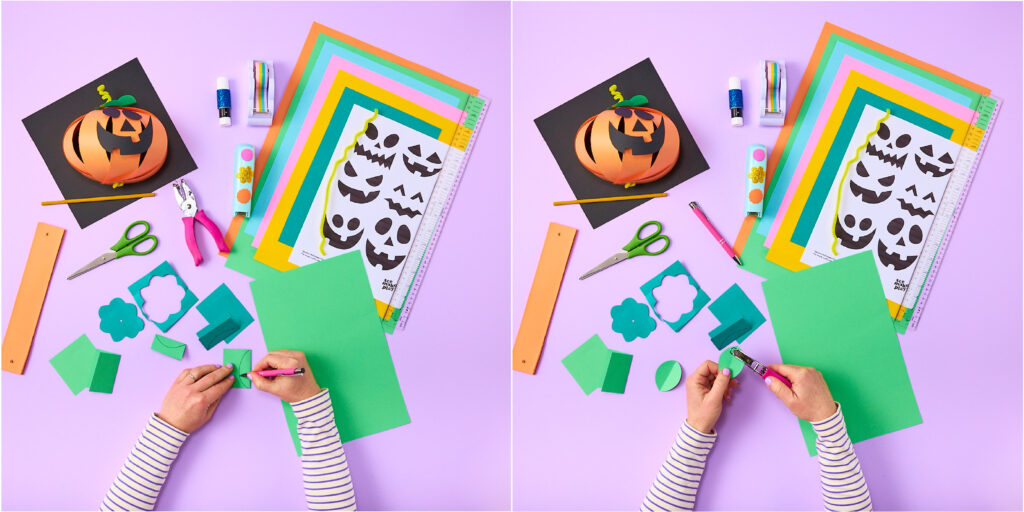
Stack the strips on top of each other, aligning the holes and put to one side. It is time to add some personality to your pumpkin. Lets start by making some leaves and a pumpkin stem. Create a leaf shape by collecting a piece of coloured paper and cut out square shapes, approximately 7cm x 7cm.
Fold each square in half, draw a curved line along the fold, and cut along the line. Open up the paper to reveal your leaf shapes. Use the hole punch to create a hole at the top of each leaf (we need to do this so we can thread your pipe cleaner through in the following steps).
It’s time to bring your pumpkin to life! Gather up your hole punched strips and stack them on top of each other being extra careful to make sure your holes are all aligned. Thread your pipe cleaner through the holes at the bottom of the strips, and again through the holes at the top of your strips.
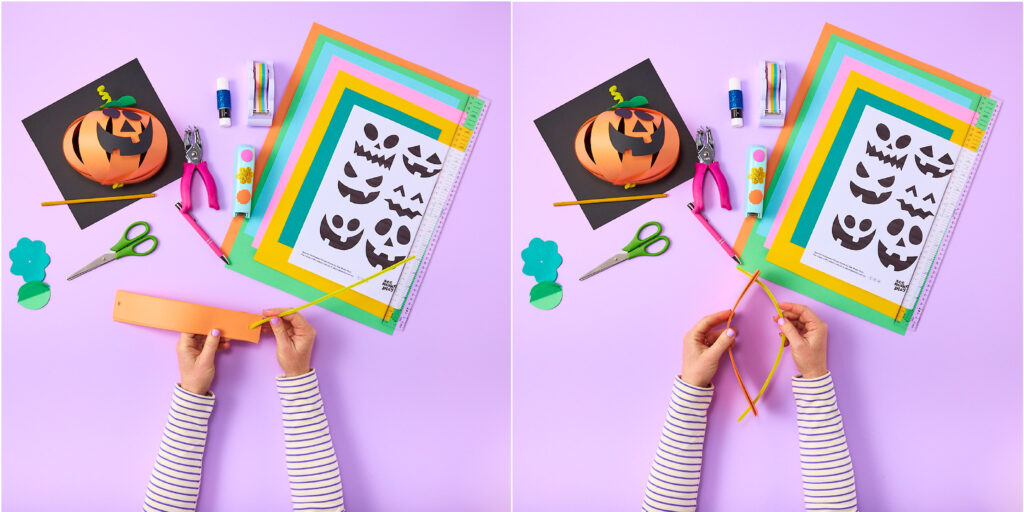
Now we will need to secure the base of your pumpkin so the pipe cleaner dose not fall through your holes. Gently hold your pumpkin and curl the bottom end of your pipe cleaner over itself a couple of times making sure it is secure at the base your paper pumpkin. Now your pumpkin is ready for the next step!
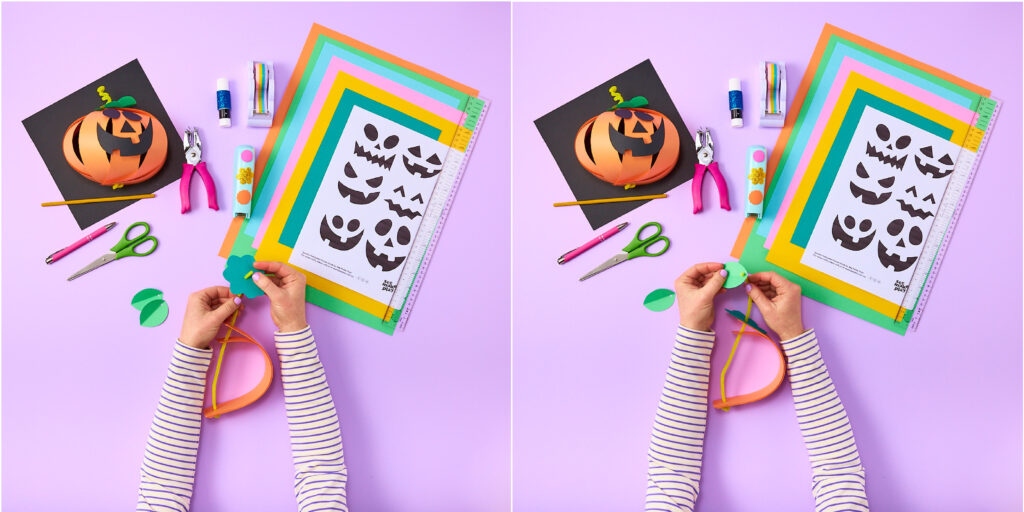
Once your pumpkin end is secured in place, it is time to addd the leaves and create your spooky Halloween paper pumpkin stem! Carefully arrange the strips of paper into an arched shape. Now you can thread each leaf shape one by one through your pipe cleaner.
Have you ever tried to create a curled effect using a pencil and a pipe cleaner? It’s so much fun to try and will give your pumpkin stem a playful springy effect. To do this, wrap the top pipe cleaner around a pencil or chopstick and keep wrapping it around until you reach the end of your pipe cleaner. Make sure its not too tight. Now it is ready to gently slide off the pencil to reveal a fun springy pumpkin stem!
Now for the tricky part! It is time to create your 3D pumpkin shape. To do this, carefully spread out the strips to form a 3D pumpkin shape. Once you are happy with your shape, you may like to use a stapler or a piece of tape to secure the top and bottom of the strips in place (this will stop the paper strips from moving).
Now it’s time to add the finishing touch – a spooky pumpkin face! You can download our handy See Make Play Spooky face template for some inspiration or get creative and design your own. Why not try a mismatched combination of eyes, nose and mouth for an extra spook-tackular pumpkin?
Trace your spooky face onto some back card (or cut out directly from our See Make Play spooky template) and use glue to secure your spooky face onto the pumpkin, and voila! You’ve created a fantastic Halloween decoration.
Now all you need to do is cut a length of coloured string or ribbon to hang your boo-tiful creation up. I hope you have enjoyed the process. Have a spooktacular Halloween!

Want to make your playtime more fun and creative?
Here are some fun tips for you:
Keep the craft going and create a cast of mummies, vampires, witches and Frankenstein’s monsters to go with your spooky Halloween pumpkins!
Make more pumpkins in different colours to decorate your home.
Up for a DIY project? Why not make a 3D spooky craft scene out of an old shoe box? Cut off the sides, add some cotton wool spider webs and create a terrifying Halloween night scene!
Don’t have the time to make a paper pumpkin like these ones? why not try blowing up a balloon and using a marker pen to draw spooky faces onto each one to create a similar effect.

Create a Spooky DIY Halloween Paper Pumpkin!


